 70’s photos? nope, just my inkjet running low again. I swear I get 15 pages before it craps out …
I made noises last week about an ornament tutorial, but of course it turned into a long-standing project that got shoved aside, and I only took a few pics. How many of you have any intentions (still) of being crafty and making some personalized ornaments while sipping hot chocolate, listening to soothing holiday music, and everyone laughing and talking happily? I thought not. Not to be grinchy, but finishing up the ornaments last night turned into me making most of them, the boys drawing a few cats and a turtle for me, and then spending the rest of the time making popcorn and stringing it with Dad. More fun than fiddly ornaments for sure!

The bell ornaments are pretty simple, and worth keeping in mind for the future if you like such things?
Start out with some pretty papers, scrapbooking packs or wrapping paper are the easiest. Grab a piece of card stock too, a pencil, some thin ribbon, a glue stick, some tacky glue, and a pair of scissors. Draw a symmetrical shape on the cardstock, the size you’d like your ornaments to be. I went with a bell-shape as it’s easy to cut out, and has lots of room to include faces, as I decided to add photos to mine. Just make sure it’s symmetrical … folding a piece of thin paper in half and then cutting out half the shape (along the folded edge) will make sure that happens. Or trace the bottom of a glass for a perfect circle.
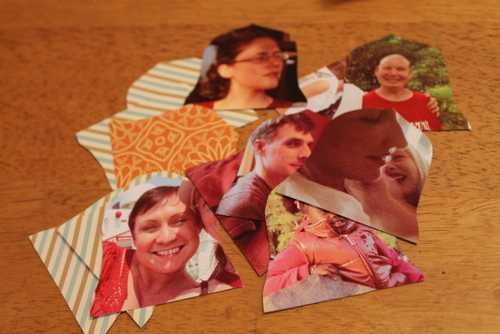
Cut your template shape out of card stock, and trace and cut out 4x as many copies of it as you want ornaments. Use a variety of papers, and if you want to get fun include photos too. For my project wallet-size pics worked perfectly.
 Remind yourself that you were born in the 70s, and pretend these are vintage pics. Fail to convince yourself, but keep trying!
Cut some lengths of ribbon (before your fingers get sticky) … about 9 inches worked for me. Grab 4 pieces of paper/pics, and fold them all in half. Glue-stick two halves together, folded side to folded side, (one pic and one paper if you’re doing it that way) … and then repeat with the other two halves. Add a dab of real glue on the back of one pair, loop and tack down the ends of your ribbon, and then gluestick the two backs together to get this. (I know this sucks as a true tutorial, which should have lots of gorgeous pics and easy to follow photos, but we’re talking reality here!)

But wait, that hard-to-see pompom on the bottom? My idea of a bell ringer thing, which was fun to stick on for the first few, but of course I got enough glue on my fingers that they started sticking more to me than the paper. I’ll post a pic once the tree is up, just so you can see the finished products en masse. I hope it’s prettier than the process!
I don’t think I’ll get into the tutorial biz, but hope to at least get some creative juices flowing in myself that aren’t all digitally based. My kids need it (and me) and so do I! Happy Thursday :).